Blog Archive

Showing posts with label beauty. Show all posts

Beauty Products Make Up Artists Recommended


Maybelline Falsies mascara and MAC concealor and Clean and Clear Oil Absorbing sheets


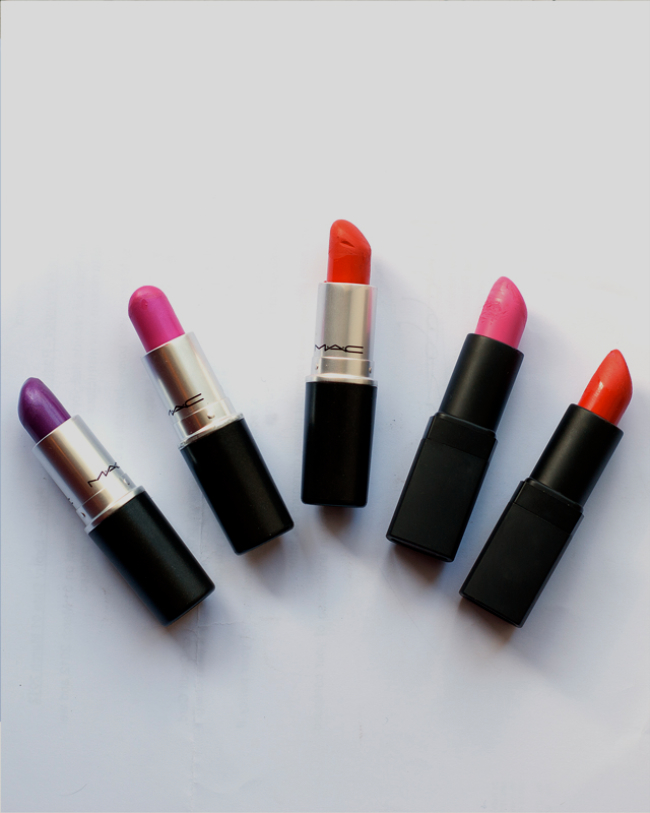
You know when something is tried on your face and you wish you'd found it earlier?  This is a teeny bit like this.    It's things tried on me from various make up artists on shoots that I ended up buying. Nothing earth shattering (except the blotting sheets) but they work for me & hopefully you too! (adjust shades accordingly):


Maybelline Brow Creme in Brown:  I have barely there brows and a make up artist used a thin slanted brush to apply it in feather-like strokes on the brows. Lasts all day - a rarity for inexpensive cosmetics.


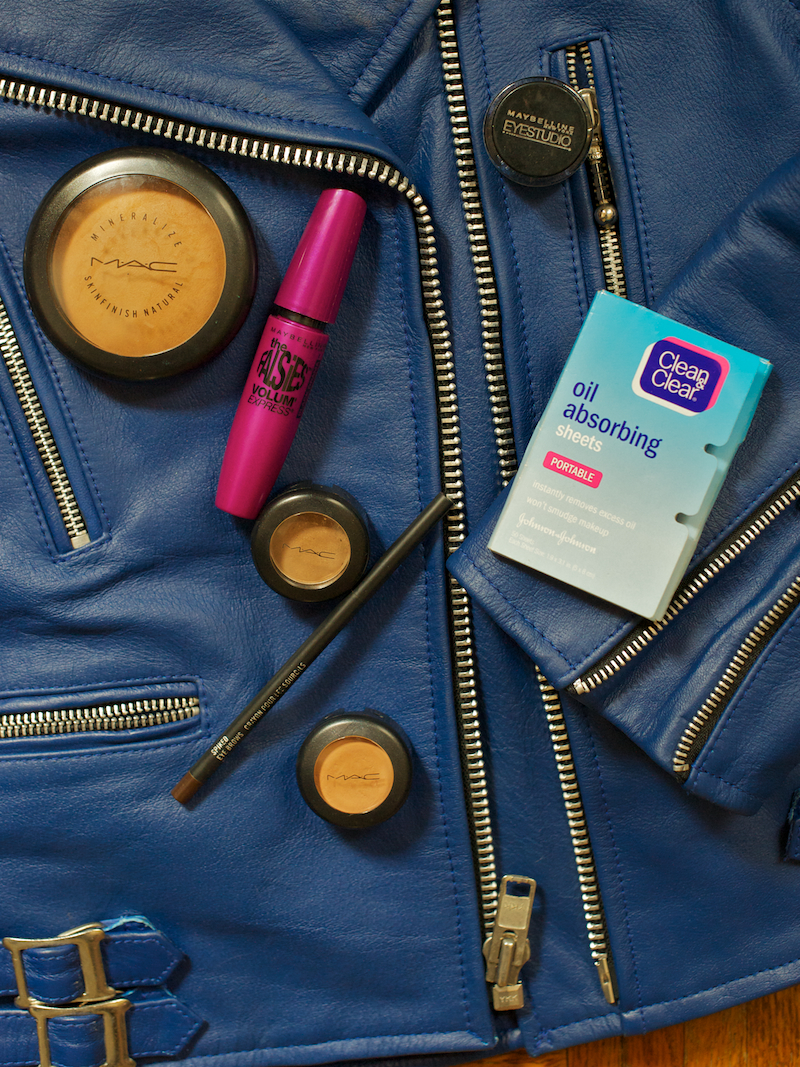
MAC Mineralize Skinfinish Natural: Dust over your foundation. It's light and gives a noticeable 'finish' to the face that I can't quite explain.  Get it online here.


Maybelline The Falsies Volume Express mascara in Black Drama:  Almost all make up artists recommend this budget brand.  I buy this one every time it runs out.  Makes my spindly lashes look instantly longer and larger.  Get is here.


MAC 'Soba' eyeshadow:  Now I know why a make up artist used this taupe shadow on my eye lids before using a black eye liner - it makes black eye liner pop.  I've been using it ever since whenever I wear black liner because of the difference.


MAC 'Spiked" Brow Pencil:  I hate the look of brow pencils but this one is soft, not sharp so no hard lines.  I use this more than the creme mentioned above.  Lasts all day. Apply lightly and it looks natural.


MAC concealor (NW35):  I've been using these for years under eyes but 2 weeks ago a make up artist told me to use this shade instead. It's a lot lighter than me (I am NC45) and this particular shade really cancel out under eye darkness. Been using it ever since!


Clean & Clear Oil Absorbing Sheets: OMG - best budget buy of all!  I should've found these years ago?!! I have an oily t-zone and ever since this was used for touch ups I was sold.  Zero powder residue and it completely & invisibly removes shine. Get it here.


If you have any fave products, let me know.

Sleek parted ponytail

Summer is approaching, and we're in for some hot, humid days. What do you do with your hair on those sticky afternoons? A sleek ponytail with a sexy side part, naturally. My friend Caroline revealed how to get the look, and Jamie Beck took photos. Here goes...
Read more »

Colored chalk tips

Today I'm excited to share another hair tutorial! My genius friend Caroline used chalk (yes, plain old chalk) to color the ends of her hair like a rainbow, and you could also do ombre or just your favorite color. Don't you love this sexy rocker look? Here's how to do it...
Read more »

Do or Don't: Eyelash curler

Last night, I hung out with my gorgeous friend Susan from Glamour, and as we chatted, I couldn't stop staring at her eyelashes. They were so thick and swoopy and gorgeous. Her eyes looked beautiful and wide awake. Her big secret? An eyelash curler. I've never had one, since I figured it wouldn't do much. But after last night, I'm sold. (Bonus: Susan said the cheap ones are just as good). Thoughts? Do you use an eyelash curler? Am I the last one to the party?
(Top photo of Audrey Hepburn, although I wish I could have taken a photo of Susan's perfect lashes!)

Do or Don’t: Neon nail polish

How rad is this bright yellow nail polish? Neon is a big trend this spring, and nail polish would be a fun way to be part of it without breaking the bank. My friend Abbey had neon yellow toes peeking out from her sandals the other day. Would you go for it?

P.S. These five colors are great, too.

(Photo by Vanessa Jackman)

Mermaid tail braid

We haven't done a hair tutorial in ages! So, my friend (and hair genius) Caroline, photographer Jamie Beck and I decided to come together to whip up this gorgeous mermaid tail. It's perfect for those lazy summer day (or date nights) when you want to surprise and awe people with your hair. I absolutely love it--in fact, it might be my favorite hair tutorial yet. How gorgeous is that braid, above?!

Here are Caroline's steps, if you'd like to try it out...
1. Divide your hair into two equal sections.

2-4. Braid each section, and tie the end with an elastic band. You'll want to do what's called a "Dutch braid." For a normal braid, you take the outside section and cross it IN FRONT of the middle section. A Dutch braid is the opposite: the outside section goes BEHIND the middle section. It's important to do the braids this way so that they'll look seamless when when you connect the two sections later.

5-6. Fatten out the two braids by pulling apart the outer edges. I like to "smush" the braid back and forth in my fingers, too—whatever makes them fuller and fatter and not so sleek.

7. Line up the two separate braids so they begin to look like one big fat braid. It's important to make sure the middle section of the mermaid tail lines up--don't worry if the ends of your braids (the hair that is sticking out underneath the elastic) are uneven, it won't matter. It's more important to line up the braid correctly, so the center of the tail matches.

8. Pin the center of the two braided sections together. I tend to use mini bobby pins since they are easier to hide, and I like to pin them in and up (you start with the pin facing horizontally, then as you push it into the hair, you direct it vertically). Use as many bobby pins as it takes, until you feel the braid is secure. I used about five little pins, and pinned about 1 1/2 inches apart, wherever I could best hide them.

(Optional step: You can remove the two separate rubber bands at the end, and just use one to combine the two tails together. I didn't do this because I used smaller rubber bands to begin with.)
"That's it!" says Caroline, "Such an easy fun way to wear something other than a plain ol' braid!" Would be great to wear this braid all summer, don't you think? :) (And here are our eight previous hair tutorials, if you'd like more summer hair ideas.) Thank you again, Caroline and Jamie!

(Photos by Jamie Beck for Cup of Jo. In the outdoor photos, Caroline is wearing this chambray top. Her jewelry is from her own line, Brvtvs, and her lipstick is So Chaud by MAC. In the how-to photos, she is wearing a vintage striped tee--similar one here--and vintage jeans--similar ones here.)

Mid-Season Sale.  Up to 70% off

Summer Essential #2: FANTASTIC natural sunscreen

After literally years of searching, I've finally found the best sunscreen. And here's why:

1. Regular sunscreen can be dangerous. Three years ago, before our honeymoon, my friend Jessa Blades, a natural beauty consultant and makeup artist, warned me that regular sunscreen often contains dangerous chemicals and harmful toxins that may actually cause cancer. (This article, most recently, made my knees wobble!) Ever since then, Alex and I have worn natural mineral sunscreen, which feel so important, especially since you slather it all over your body (and your children's bodies) everyday.

2. But natural sunscreens look bad. Yes, here's the catch: Natural sunscreens don't really absorb into your skin. You end up covered in sticky lotion, looking white as a ghost; and sunscreen can have flaky residue, which is, needless to say...not attractive. I secretly hate using it, but know it's worth it.

3. And here's the solution! I had almost given up on finding a natural sunscreen that doesn't look terrible, but now I'm thrilled to say I've finally found one!! Josie Maran's Daily Sun Protection is both natural and absorbs beautifully. The lightweight sunscreen also contains argan oil, which makes you look young and glow-y. Alex and Toby will be wearing it this summer, too. I highly, highly, highly recommend it. Find it here.
Here's to a happy, healthy summer! (More summer essentials to come...)

(Top photo by Garance Dore)

Summer Lipsticks - My Picks


Untitled


The ones I reach for the most... 


CLICK FOR MORE PICTURES >>>